I keep referencing how busy I've been, in my previous posts, trying to get the house ready for when Meghan gets here in June, so I thought I better share some pics of the work. While there's no real deadline, I have a self-imposed deadline of trying to get all of the inside woodwork and painting done in the next four and a half weeks. We don't want mom to be breathing in fumes and sawdust do we?
I'll be sure to post a complete before and after sequence when I'm done with our bedroom, but I wanted to share some photos of the progress I'm making, mainly to reassure my wife that all of those Lowes credit card charges are actually resulting in WORK, not just a garage full of tools :) Though, (men take note) signing up for a project like this is an excellent excuse for building out a tool collection.
I hadn't really worked with wood much since my father and I built a custom loft bed for my dorm in college. It was pretty sweet. We had built in lighting and ran electric conduit up top and underneath, all controlled by a built-in light switch. It wasn't too complex, but it was pretty cool when I set it up in my room.
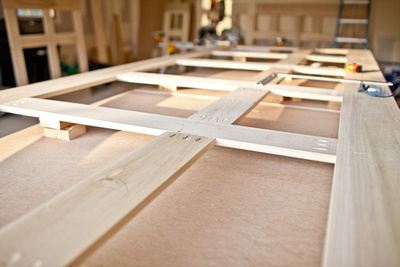
Here's a quick shot of one of the larger frames that I had to build.
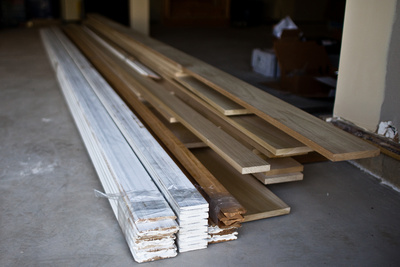
This all started with this woodpile,
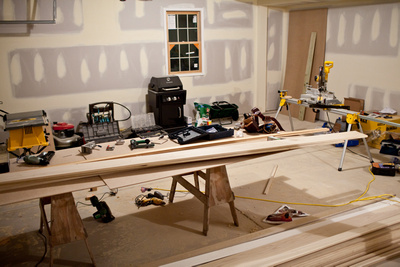
and was cut up and put together with these tools,
to create the foundation for the wainscoting.

I know you can't see it yet, because the vision is still in my head, but our bedroom walls will be lined wainscot panels that have a 4" shelf that runs along the top edge around the entire room. The inside of each square/rectangular panel will be finished off with decorative trim and then it will all be painted in a glossy white "trim" paint. To top it off, I'm putting up crown molding at the top of the wall and will run rope lighting around the room to illuminate the tray ceiling.
My goal was to create a super-comfortable room for Meg when she needs to sneak a few minutes for herself. Don't worry, the girls' room is getting some major attention, too, I just wanted to have our room complete before she gets here. To top it off, I'm adding a patio on to the back of the house with a firepit! I'll share those pictures in another post.
ReplyDelete奇摩女孩視訊聊天網-UT聊天室福利視頻
台灣甜心視訊聊天室-很黃的聊天室
漾美眉視訊交友聊天室-真人秀聊天視頻網站
一夜情情色聊天室-台灣免費視訊聊天室
成人免費視訊聊天室-福利啪啪視頻吧
破解視訊聊天室-福利聊天室你懂的
uthome視訊聊天室-真人色情表演視頻網站
showlive聊天網-9158聊天室你懂的
視訊聊天戀愛ing-同城視頻聊天室
國外視訊 show 免費看-同城裸聊直播視頻